- Joined
- Jul 16, 2008
- Messages
- 2,945

This is a tutorial to show you how to make your signature appear correctly below your posts.
If you follow these steps your signature image will appear correctly.
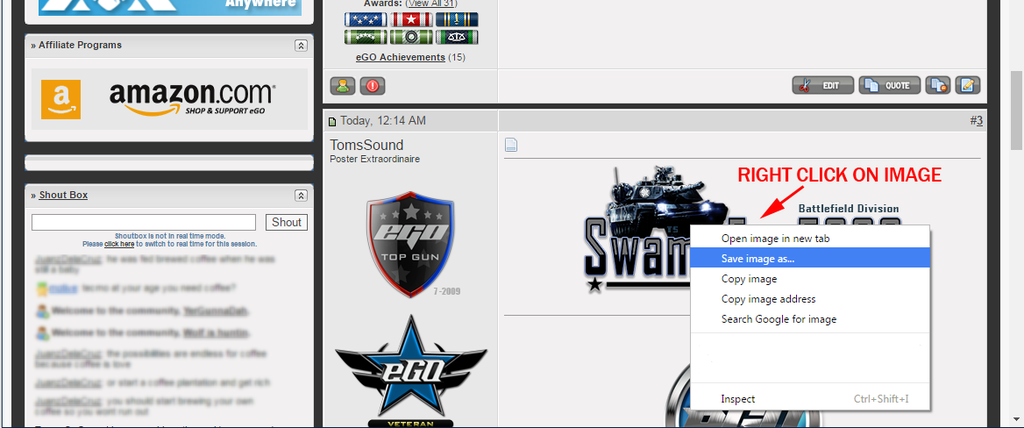
1 - Start with the image you want to use. Right Click on the image and choose "Save Image As".
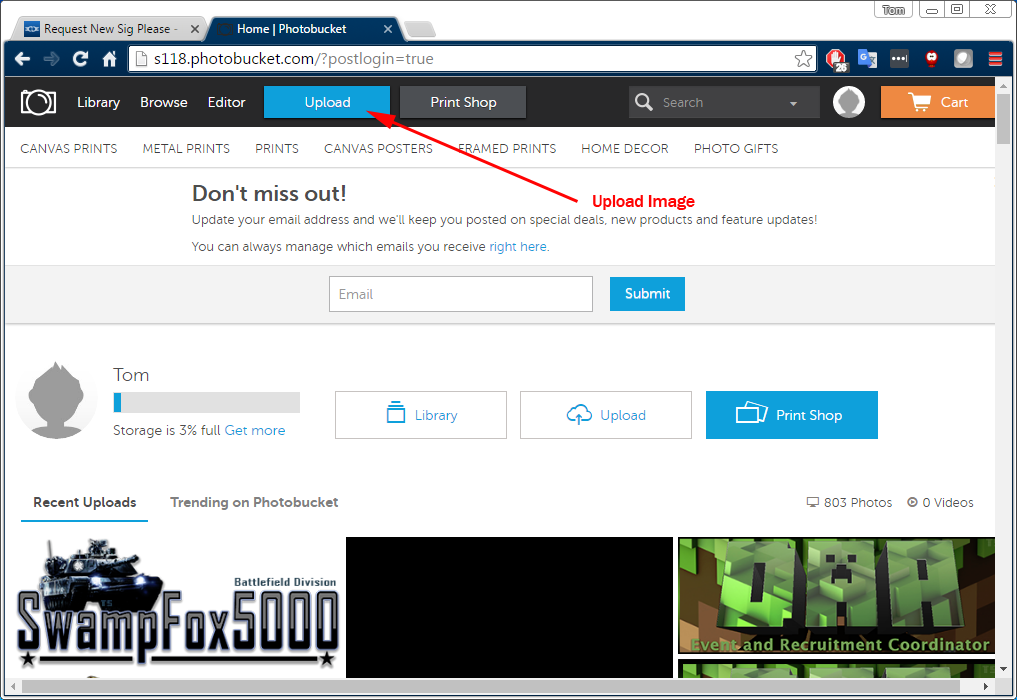
2- You will need to host the image somewhere on the web. We will use Photobucket.com as our image host in this tutorial. However pretty much any image host will work.
Create an account at Photobucket.com

3 - After you have your account setup. You will need to upload the image. Click on the "Upload" button at the top and find your image on your computer that you want to upload.
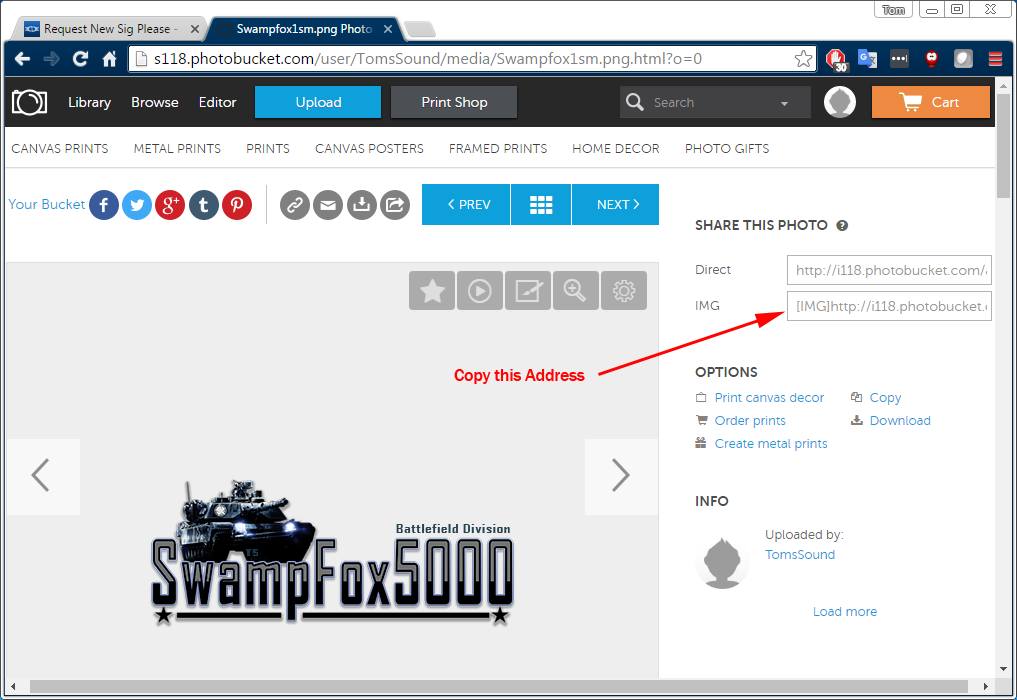
4 - Copy the address for your image. Photobucket will add the IMG Tags for you.
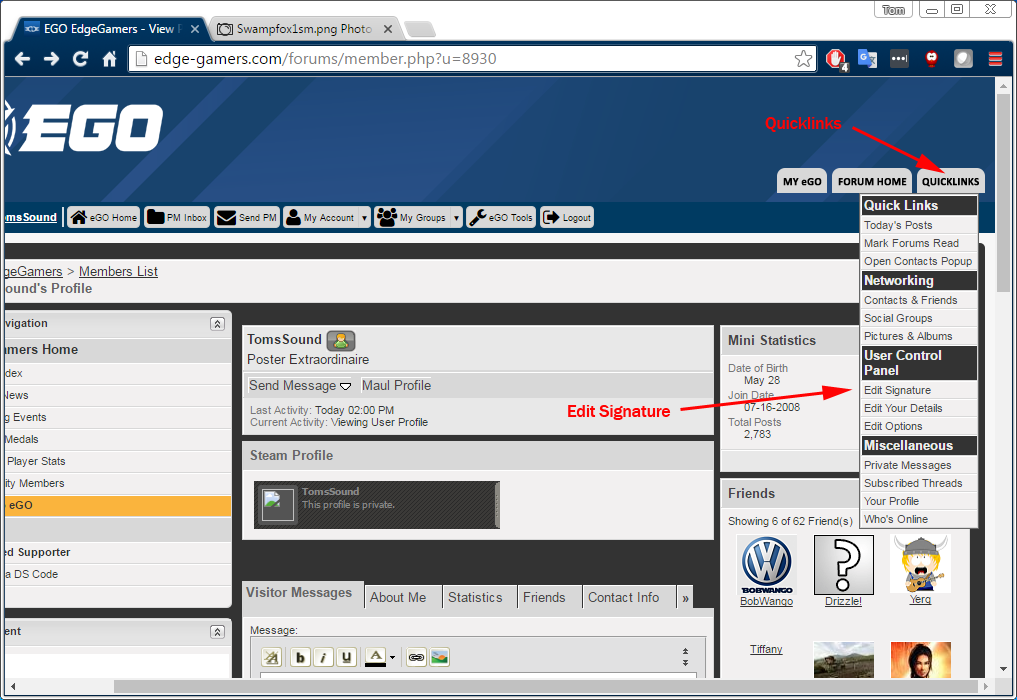
5 - On the EGO website - Click on the "Quicklinks" Button in the top right. Then choose "Edit Signature"
6 - Paste the address into the "Your Signature" box. You can also use either the CENTER Tags or Center Paragraph button to center the image,
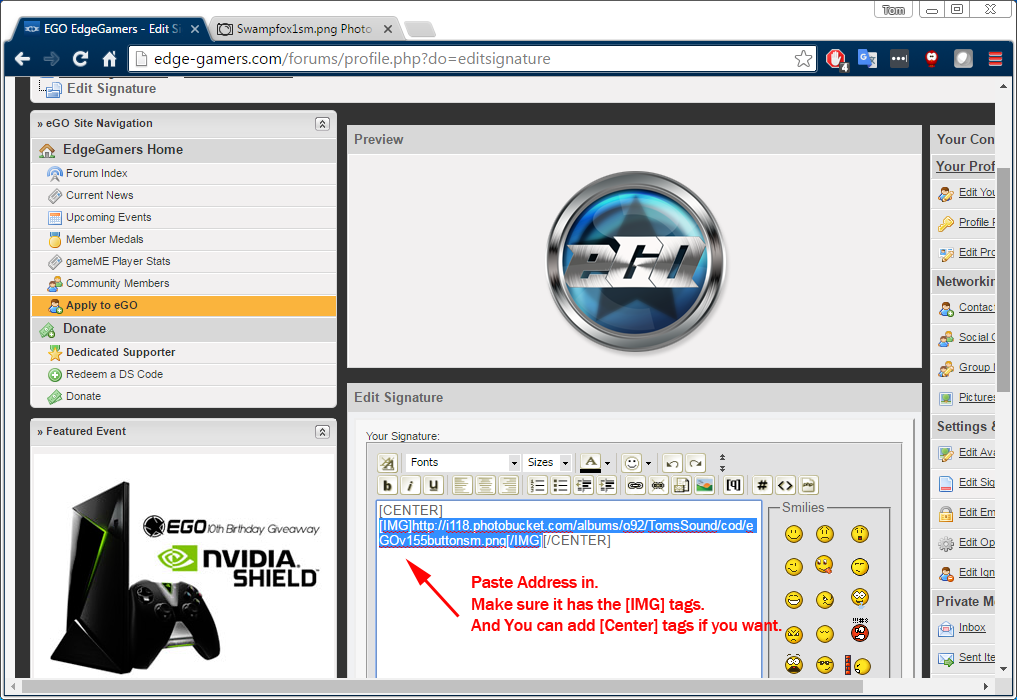
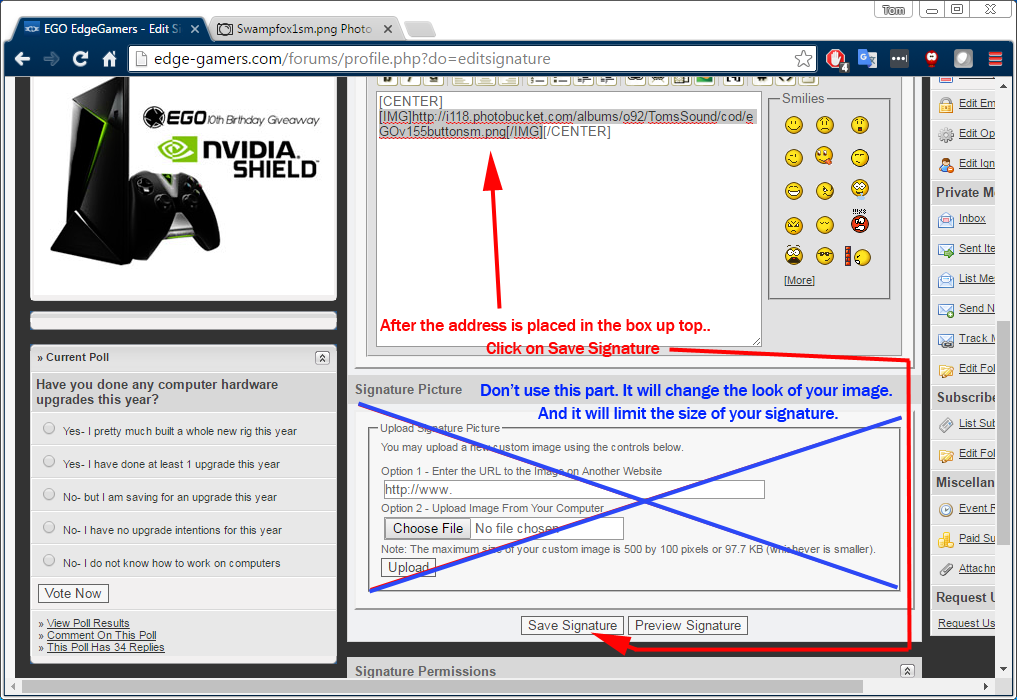
7 - Don't bother using the Signature Picture box below.. Noted in Blue. Using this part will try to upload your image to EGO servers and by doing that you limit not only the size of the picture , but you also lose the transparency. Don't use the part in blue.
After your Image address is in place. Click "Save Signature"
Then your signature should appear.
Good Luck!
Last edited: